

How To Get Better With Anatomy Drawing
If you want to abound as an artist when your field of study of choice is the human course, and then you need to learn how to practice drawing anatomy.
There's no getting around this. Unless you lot accept a solid understanding of how the human torso is put together and how the muscles and basic move, y'all won't exist able to draw realistic human figures.
Drawing the human form is not without its challenges, and ane of the chief amongst them is existence able to draw figures that appear life-like. Without a solid understanding of anatomy, your figures will come out looking potent and lifeless.
If y'all await back at some of the former masters, yous can see that they had a proficient understanding of anatomy. Leonard da Vinci, one of the greatest and virtually influential artists in history, was renowned for his study of anatomy.
The old masters studied beefcake considering they understood the importance of knowing how the body worked so that they could reproduce the trunk in their artwork.
If you lot promise to be able to create drawings, paintings, or sculptures that await life-like, and so y'all need to acquire how to practice drawing anatomy.

Dynamic Figure Drawing past Shane Wolf is a comprehensive online course that will teach you lot i of the most challenging things to convey: a sense of movement and energy in a figure drawing or painting.Use this link to access Drawing Courses at Domestika
Utilise the following code to receive and 10% disbelieve.IMPROVEYOURDRAWING-10Use this link
Drawing the Proportions of the Human Course
The human form is complex. When drawing it, you have to draw a caput, neck, torso, artillery, legs, and easily. That's a lot of unlike areas you have to focus on, and you have to brand sure that they are all drawn proportionately.
When y'all are drawing a portrait or a figure, if the proportions are not correct, the drawing will non look right. How practice you lot become better at drawing the human figure proportionately? Yous practice. A lot.
- When starting out a new drawing, you should always start with a light sketch.
- Trying to draw in detail also soon volition almost always cause problems downwardly the road.
- You need to start out with a light sketch to establish proportions when you are drawing.
- Make sure that y'all keep your arm loose and describe with your arm, not your wrist. You desire lite strokes that will help to convey a sense of move to the piece when it's finished.
- If you want to draw realistically, then you need to use a model for reference.
- The model can be a live model or a photograph. Live models are preferable, merely photos are more convenient to work from. When sketching out your model, pay attention to how different parts of the body chronicle to ane another.
- The size and shape of diverse body parts and facial features are like in all people, but at that place are slight differences.
- These differences are what make u.s. all unique. When trying to capture a practiced likeness of a model, getting everything in the correct proportions essential.
Drawing the Head and Neck
When drawing the human figure, getting everything in proportion is essential, but it's even more than of import when you are dealing with the head and neck. The homo confront is the virtually recognizable thing in the world to all of usa, and a mistake made when drawing the face up, head, or neck will be easily recognizable.
Then, how exercise you lot avoid making mistakes when drawing the head and cervix?
Starting time, always showtime out your drawing with a light sketch made with loose strokes. Any drawing you ever create should commencement out with a solid foundation, and the kickoff pace in creating that foundation is with a light and loose sketch.
Don't focus on details with this sketch that will come later. Instead, just get the basic shape of your effigy down, forth with the posture y'all want your figure in.
Information technology helps to break down the unlike parts of a person into simpler forms when you are drawing the effigy. When drawing the neck, it'due south basically a cylinder, and the head is shaped like an oval.
These are oversimplified explanations, but these are the basic shapes. They are going to differ from person to person, so wait at your reference and adjust your sketch accordingly.
- Later y'all accept your basic shapes for the head and neck laid out, you tin can start to add additional basic shapes to begin to turn your sketch into something that resembles a person.
- Offset by cartoon a very lite line downward the center of the face. This is where y'all are going to draw the olfactory organ of your model.
- Take intendance to place this line in the correct place based upon the angle of the face up.
- Adjacent, draw a light line indicating where the eyes will be on your drawing. Look at your reference and run across where they sit on your model'due south face, then draw the line there.
- Then draw a third line nether the eyes indicating where the bottom of the nose will be, and then a fourth ane for the mouth. In each example, make sure that yous are measuring your model and placing the lines where their features are.
- The last part of your basic sketch is the ear. For most people, the top of the ear is right around the eyes in terms of location on the face up, so sketch in an oval shape indicating where your ear will be placed.
- Afterwards you have your foundation in identify, you tin can start to add some features and details.
- Start to sketch in the basic shapes of the face and neck using the guidelines you have already laid out.
- Make sure to proceed your sketch light, you are all the same mapping out features, so going besides dark also soon would be a fault.
- This is the planning stage, so plan things out and build a solid foundation for the rest of your drawing.
- Now that y'all have your basic sketch downward go ahead and start adding darker lines and finalizing your features.
- One time they are done, it's fourth dimension to add shading and highlights. Shading and highlights are extremely important when drawing the caput and neck.
- If washed correctly, they can give your drawing a three-dimensional wait. If non done correctly, they will make your cartoon look artificial.
- To describe shadows realistically, yous demand to understand where the low-cal source in your drawing is, and how that low-cal source is going to affect the caput and cervix of your model.
- The nose is the highest point on the face, and light will cause shadows to cast from information technology. For the sake of this instance, let's say that the light source for your drawing is directly to a higher place your model.
What will the shadows look like?
Offset, the eyes of your model will be in a shadow. Light will be blocked past the forehead and brow, casting a shadow on the eyes.
There will besides be a shadow under the nose since the nose volition block low-cal. The upper lip will be slightly darkened when the light source is direct higher up, too.
The last significant shadow will be on the neck, which is under the caput, and will exist in a shadow equally a result.
What nearly highlights?
In this case, the light would strike the bridge of the nose. As well as the forehead, cheeks, and chin. At that place will also exist a highlight on the lower lip.
- When drawing shadows, make sure that your account for your calorie-free source.
- For example, if the light source if above and to the correct, then the shadows on the head and neck volition be cast down and to the left.
- Ever pay attention to the way that light affects the confront and torso of your subject field. When done well, lighting can plow a apartment image into a work of art that appears 3 dimensional.
The side by side component for drawing the head and neck is adding hair.
Many artists struggle when drawing hair, and then if this is something you lot accept trouble with, don't allow that carp you. Simply keep practicing, and you will get improve at it.
- When drawing hair, you don't have to describe every single strand.
- Y'all also don't want to just shade in the hair since that will look apartment. What y'all need to do is find a happy medium here.
- First, remember that pilus, similar everything else, is affected by low-cal and shadow.
- When drawing pilus, including eyebrows or facial pilus, brand sure that you lot account for the low-cal source.
- I of the more straightforward methods for drawing hair is to add together a base of operations colour, then piece of work from there.
- If you lot are drawing with graphite, then blend in a greyness layer of graphite. And then go through and add darker areas and use an eraser to remove areas for highlights.
- So, later on you have the highlights, mid-tones, and shadows established, you can go in and commencement to render the pilus.
- Add together some indications of strands of hair, just don't go overboard.
- The heart of the viewer of your drawing will not choice up on all of the minute details anyway, so just give an indication that at that place is pilus there, and that should be enough.
I of the about challenging aspects of drawing the head is cartoon eyes that look existent and life-like. Let's start with the basics hither.
- Eyes are roughly almond-shaped and have an upper and lower lid.
- Then sketch in the basic shape. Next, draw in the inner corner the tear duct, then add the iris and pupil.
- Now the fob is to expect at how calorie-free affects the eyes. Eyes volition typically be in shadows, but they are highly reflective, and then you need to render those reflections as well.
- Much similar you practise when drawing pilus, you don't have to draw every final detail.
- Just giving an indication of shadows and highlights is enough to get the viewer of your work to recognize that you have drawn an eye.
Cartoon the Torso
When drawing the torso, it helps to think of the basic shapes involved. The man torso is roughly rectangularly shaped, with the top existence wider than the bottom for near people.
Then, start by sketching in this basic shape. Having a solid noesis of anatomy is essential here.
Understanding how basic and muscles move tin hateful the difference between drawing something that looks flat and drawing something that looks like a 3-dimensional man body.
When drawing in the major muscle groups, you mustn't outline them. Unless you are drawing a comic book, you should never outline your figures.
Merely sketch in the shape, wait at your light source, and let low-cal and shadow to indicate the placement of muscle and fat.
Drawing the Arm
- When drawing the arm, attempt to picture an elongated cylinder. Artillery take a generally circular shape, with some abrupt angles effectually the wrist and elbow.
- At that place are likewise a lot of muscles and veins to argue with when drawing an arm, so agreement beefcake is essential.
- The primary muscles to exist concerned with are the biceps, triceps, and shoulder. These are major muscle groups whose shape changes depending on the angle of the arm.
- When rendering an arm, brand certain that you account for the light source, and add advisable shading and highlights.
Drawing The Legs
- Legs are similar in artillery to their principal shape but are more substantial.
- The thigh as well tends to be quite a bit larger than the lower leg.
- When drawing, the muscles in the leg focus on drawing the full general shape of the quadriceps, the calves, and the knee cap.
- Remember to await for how light creates shadows and highlights, as well.
Drawing and Sketching the Hands and Anxiety
Drawings hands and anxiety is a challenge for many artists, even artists that take been training and practicing for years. Hands, in particular, are challenging to depict. There'southward the hand, four fingers with three joints each, and then a thumb with two joints.
That's a lot of moving parts. Don't forget veins either. They are nowadays in most hands and take to exist drawn in besides.
As with every other part of the human body, when drawing hands and feet start out by cartoon their basic forms, then motility forrad with more than details from there.
The best way to recall of fingers and toes is to motion-picture show tubes that accept joints.
These joints motion to modify the shape of the fingers and toes. Just each segment of these tubes remains the shape size regardless of how the joint bends.
And then, when drawing hands or feet. Focus on the position of each segment of finger or toe concerning the angle that yous are viewing your subject at.
Merely draw each segment and focus on each section at a time, so brand certain they line upwardly with one another. While this approach to drawing fingers and toes simplifies things, it'southward still going to take y'all a good deal of practice earlier you can master drawing them well.
Learning to Draw the Human Skeleton
If you want to learn how to practise drawing anatomy, you need to acquire how to depict the human skeleton. Why?
Considering the skeleton is the framework that the rest of the human body is congenital on. You demand to understand how the joints connect, and how they motion so you tin can realistically depict human figures in your artwork.
When drawing the skeleton, you don't need to focus on creating detailed shadows and highlights. Unless, of course, you are planning to draw a skeleton as a finished slice of fine art.
Instead, focus on getting the basic shapes down. Does this mean yous tin ignore shadows and highlights? Yous could, but anytime you lot can exercise accounting for a light source when drawing, you should take it.
When drawing a skeleton, you could try drawing it in ink. If you are cartoon just to study beefcake, and non to create finished artwork, drawing with a pen tin be a lot of fun. Ink lets you get shapes down quickly, and facilitates quick sketching.
No matter what medium you lot choose to draw your skeleton in, make sure that you pay attention to the size and shape of the bones, and how they all connect to each other.
How to Draw the Ecorche
Have yous e'er wondered how to depict the Ecorche? Accept you ever wondered what an Ecorche even is? Ecorche is a term used to describe an anatomical depiction of a body, minus the peel.
Before you allow yourself to feel disgusted, keep in mind that artists have drawn the Ecorche for centuries.
Why is Drawing the Ecorche so Important?
Because it helps you to get familiar with anatomy. The best thing you can practise as a figure artist is to draw the Ecorche in as many different positions equally possible.
You don't just want to draw it continuing there, you want to depict it in motility. This will assistance you to see how the muscles movement, which is essential when you are trying to draw a realistic looking person.
Drawing the Facial Expressions
Facial expressions are a challenge fifty-fifty for seasoned artists. Why is that? Because facial expressions are so intricate.
Facial expression depicts emotions, and so getting them right is essential if you are trying to create a sure mood in a drawing.
For example, if you are drawing a somber scene, the last thing you want is to depict a face on your figure that appears joyful.
How do yous get better at drawing facial expressions? By practicing. Before you start cartoon facial expressions, make certain that yous can draw facial features in proper proportion to each other.
There's no sense in trying to run hither before you can walk. Practice drawing different faces over and over once more. Then do anatomical studies, and do a lot of them.
Then, wait at photos of people making different faces. Or, improve notwithstanding, look at a live model making unlike faces. Then you lot will have a decent foundation to build on, giving you the insight you demand to create realistic expressions.
Y'all should also spend fourth dimension people watching. Just watching how people act in daily life can help provide you with agreement how different facial expressions convey dissimilar emotions.
Anatomy Drawing Tips: Depict From A Real Physical Model Or Body
Take you always seen an artist mannequin? Of course, you lot have. If you lot are an creative person, you have undoubtedly seen an creative person mannequin.
They are fantastic tools for giving an artist a visual reference to come across how limbs look at dissimilar angles, and also how calorie-free interacts with those limbs at different angles.
But is an artist mannequin a substitute for a alive model, or even a photograph? No. Not at all. A mannequin is pieces of wood that take joints in them so you tin pose them in dissimilar positions.
A live model, or a photo, is a existent human figure that you can look at for reference. There really is no comparison.
Why would you use an creative person mannequin?
If you lack access to a model or a photo for reference, so an artist mannequin can be used equally a stand-in. Information technology won't be as good as a model or photo, but it beats having nothing.
Another possible employ would be for shadow reference for a effigy y'all have a photograph of. Allow'due south say that you have a picture of a model in a pose that is perfect for the drawing you are doing. Merely, the light source isn't quite correct? What do you practice? You go out your trust artist mannequin and utilise it to visual where the shadows should be. This saves you the endeavor of having to mentally movie where shadows should be, giving you a visual reference that can help you to create a more realistic cartoon.
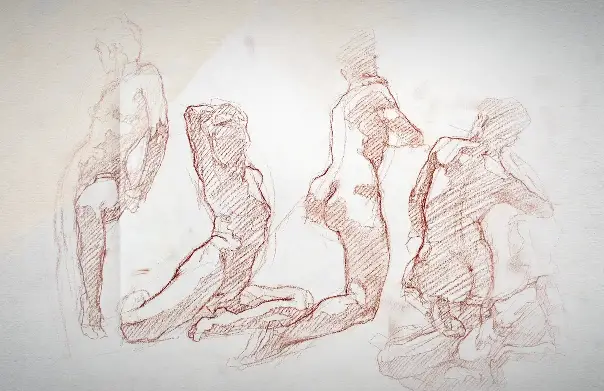
'Drawing Figures On The Hoof'
The human body is constantly in motion. Even as we sit in an idle position, our chest moves with each jiff, or optics blink, our stomach moves in and out, etc.
The signal here is that since the human body is ever in motility, even when it appears to be at a state of residual, you need to acquire how to depict figures that convey a sense of movement. How do you do that?
You exercise it by drawing figures on the hoof. What does that mean? It merely means that you are drawing quickly and instinctively.
You aren't worried about getting everything perfect, you are just trying to get your ideas down on paper as chop-chop as possible.
When drawing like this, don't draw with your wrist. I'll repeat that, don't draw with your wrist. Draw with your unabridged arm. Make big strokes, and don't worry about the details!
Drawing figures on the hoof will permit you to draw a figure quickly. That means y'all can draw some other ane more than quickly, so another. When you main the skill of cartoon of the hoof, you'll be able to draw dozens of figures an hour.
Why is that important? Because information technology lets you arrive much-needed practice. How practice you get meliorate at drawing the man form? By cartoon it as much every bit possible.
When drawing of the hoof, yous tin exist doing this equally practice, or as a precursor to a finished drawing. If yous are doing this as a precursor to a concluding cartoon, make sure that you go on your sketch quick and calorie-free.
When you draw in this manner, your concluding artwork volition often take more life and convey a greater sense of motion.
Then, how should the process of drawing on the hoof be used to create a finished drawing?
First, either cull a photo for reference or detect your model. Next, start a low-cal sketch of your figure using quick strokes. No details are necessary at this point. Sketch your figure apace, paying attention to the pose and posture.
And so, later y'all have this quick sketch done, get ahead and cease the cartoon; however, you lot ordinarily would.
The Efficiency of Line: Drawing Figures With A Few Simple Lines
Are incredibly intricate drawings of the human form that accept tight details and correctly rendered shadows and highlights amazing to look at?
Absolutely. Is this the just manner to draw a human figure? Absolutely not. However, yous choose to develop your own style, don't discount the possibility of drawing simpler figures using fewer lines.
Many artists accept mastered the power to non just draw with minimal lines merely to practise so while notwithstanding capturing the essence of their subject area.
When you draw in this manner, you have to utilise groovy intendance. With a more sophisticated line cartoon, a few mistakes may exist overlooked. With a simpler line cartoon, any mistakes you make will be magnified. You lot tin can depict figures using fewer lines and a simpler approach as a sketch, or as a finished piece.
Drawing The Human Form Is Very Challenging And Rewarding
For many artists, the ultimate achievement is existence able to draw a human class realistically. Many of employ first discovered our honey for art past looking at paintings past the old masters.
We wondered how did they do that? How did they create something so amazing and so life-like? It was this sense of wonder that drove many of united states of america into exploring our ain artistic talents.
The human form is complex, but information technology tin be mastered if y'all are willing to work to exercise it. There'due south no quick solution here, you either put in the time, or you fail. Try to pause downwards the human being form into simpler shapes to build the foundation of your artwork.
Use lite, gestural drawings to assist establish the limerick and convey a sense of motility. Ever pay attention to the lite source and how it casts shadows and creates highlights.
You also demand to develop a way of your own. You could draw in a highly rendered manner, with a unproblematic line approach, or some mix of the two. Higher up all else, have fun, don't get discouraged, and go along working then that yous can master cartoon the human grade.
It takes time to principal the human being form, and then be patient with yourself as you progress along your creative journey.
My Favourite Drawing Resource
General Drawing Courses. I really likeUdemy if you are looking to develop your knowledge of cartoon techniques Udemy is an excellent choice due to its broad range of artistic courses and excellent refund policy. They often accept monthly discounted deals for new customers, which you can cheque here.Apply my link.
Sketching and Collage. Accept a look at this sketching resource I take created.Use this link.
Proko. Is one of my favorite teachers who surpasses in the education of Anatomy and Effigy drawing. Prokos class breaks down the cartoon of the human body into easy-to-follow components aiding the beginner to make rapid progress. For this,I really like Proko.
Fine art Easels. One of my favorite ways to draw is by using a cartoon easel, which develops the skill of drawing on a vertical surface. TheH frame easel is an excellent vertical easel mode to add diversity to the style and blazon of marks you create when using a drawing board.
To see all of my most up-to-date recommendations,bank check out this resource I made for yous.

Source: https://improvedrawing.com/how-to-practice-drawing-anatomy-the-essential-guide/
Posted by: ramosbuttle.blogspot.com
0 Response to "How To Get Better With Anatomy Drawing"
Post a Comment